I know it's a little late for mailing cards - but if you hand deliver holiday cards, these are quick and easy to put together. I originally shared this project on the Pebbles Inc blog last year, but I didn't ever share it here - so I'm doing it now! If nothing else, bookmark the idea for next year - these cares were super easy and I think they are pretty darn cute!
I usually purchase photo cards to send out to the masses, but I like making handmade cards for a few special people in our lives. That being said, I always seem to run short on time, so it's a good idea to create a simple card and duplicate it using different papers and elements.
I started by trimming a patterned paper to 5 1/2" x 5 1/2" - then I cut 1" from the bottom to create a coordinating paper strip to add to the card front.
Next, I cut white cardstock to 4 1/2" x 3 1/2" and stitched around the edges with green thread. (I love using my sewing machine on my projects!) I placed the white stitched piece in the center of the pattered background paper, then placed the 1" coordinating paper strip on top - I varied where I placed the coordinating strip.
Next, I added a tag from the coordinating tag set. I used foam adhesive behind some of them for a touch of added dimension. I also scrounged around in my ribbon scraps to find fun ribbons to tie through the holes of each one. As you can see, I tilted the tags slightly when I attached them over the white stitched piece.
Next, I added coordinating printed die-cut pieces to each card. Some are tucked slightly under the tag, some are overlapping on top. And finally, I added some gold puffy sticker thickers to some of the cards (the holly leaves and berries).
After they were complete, I attached all of the card fronts to white cardstock bases and now I have a start to my handmade cards for this year!
Thanks for stopping by - I hope you feel inspired to whip up a few festive cards yourself now!
Well hello friends, today I'm here to share a quick and easy last-minute Christmas craft! I first shared this project on the Pebbles Inc. blog last year - but I thought it was appropriate to share it here again!
When my kids were little, I started making oversized tags to designate stockings so dear old Santa didn't get confused when he tiptoed into our family room during the night. I thought it might help him out if he could locate the stocking (with each child's name), then place the stocking next to the gifts for that child. I think Santa appreciated my help, because it can sure get confusing for an old guy to keep everyone straight! ;) Here's a peek at the tags I made for old St. Nick this year:
Each tag is about 5" in size - so large enough to be easy to see, but small enough that I could fit all four on one sheet of paper - win/win. Here's a quick step-by-step photo set to show you how I made these!
First, here are the pieces. An ornament shape (about 5"), a coordinating circle, slightly smaller, a banner, the child's name (I cut mine with my Silhouette from white cardstock, but you could also use letter stickers!), and anything you might want to use for embellishment - I chose a printed die-cut, and some gold holly berries and leaves (thickers) :
Start with the ornament shape:
Add the slightly smaller circle:
Now add the banner shape - I used foam squares to attach my banner because I love the little bit of dimension it adds:
Now is the time to add the name over the banner:
Add embellishments now! Start with the coordinating printed die-cut:
Complete the tag by adding a bit of shimmer! These gold puffy holly berries and leaves are perfect:
Now old Mr. Claus will be sure to give the correct gifts to each kiddo!! Here's a closer look at all four completed tags:
I shared a layout featuring my family and a little introduction of myself over on the Pebbles blog last week. I thought I'd share here as well!
Hi Pebbles friends! I've been around for a while, but many of you haven't...so first of all - WELCOME! I'm Wendy Sue and I am a tried and true Pebbles fan! I love creating cards, layouts, and all things paper with the fun and beautiful designs created by the talented team at Pebbles! I thought I'd share a few tidbits about myself, along with a layout I created recently.
The most important part of my life...my whole life...are the people in this photo! My family. My husband. Three sons. One daughter. And one son-in-law.
We live in a high mountain valley in Utah. It's the beginning of June and there's still snow - just a hop, skip, and a jump away!! We love it here. We enjoy all things outdoors - hiking, biking, walking, swimming, boating - all the things!!
When I'm not outside, you can usually find me creating something fun with paper. Or reading a good book. Or baking my favorite cookies.
My degree (and my day job) is in accounting...so I'm pretty much working with paper in one way or another all the time. I also enjoy teaching people how to make beautiful projects, document their memories, and create cards to share with special people! Here's a quick little tutorial for the subtle little shaker box at the bottom of my layout (did you see it?).
Start by stitching two vellum "pockets" onto patterned paper. I trimmed this fun polkadot paper to 11" x 11" and added two pieces of vellum - one to the top and one to the bottom - the middle will be covered by the photo and coordinating paper later.
Make sure to leave the top part of the bottom piece open (stitch the left, bottom, and right edges only)
You can find some confetti, or use one of the puffy stickers from the collection (if you don't think you'll use it otherwise).
Cut open the sticker.
Pour in the confetti.
Now stitch along the top to close the shaker! And finish building the layout on top of it.
Thanks so much for stopping by today - I hope you're inspired to try something new. Come back soon!!
And here are some quick links to the products I used for this page:
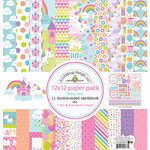
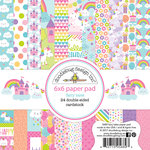
Once upon a time I was on the Doodlebug design team! For some reason, I neglected to share some of my projects here...but it's not too late - so I'm sharing now! This project was created for a team-wide "Off the Page" Challenge! I love having cards, gift bags, and tags on hand so I can wrap a gift in a fun, unique way at a moment's notice. Here's what I created using the darling "Fairy Tales" collection:
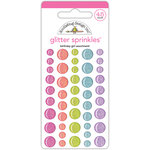
Let me show you some of the details! I used patterned papers, including the 4x4 cards on each bag. On this one, I really wanted to use those sparkly rainbow sprinkles, they are just too cute!
Don't you agree?
Here's the next bag - I used some cute heart sprinkles in place of the raindrops below the clouds.
Speaking of clouds, I layered several different types and I love how they just pop right off the bag:
And finally, the cutest dang cupcake doodle-pop ever is the star of this bag:
I'm so excited to see that many of these products are still available, even though I created this project years ago!!