Good morning, Pebbles friends! It's Wendy Sue here with you today - sharing a project I created for my daughter, Meagan, who will be graduating from high school in just a few short days and then will be heading off to the college of her dreams only a few weeks after that.
To say I am having mixed emotions about the upcoming events is an understatement. On one hand I keep wondering how my sweet baby girl (who it seriously feels was just sitting on my lap with her long brown curls and her American Girl doll and books only a few days ago) is ready to pack up her favorite clothes, books, and mementos and move out into the big big world to live on her own. And on the other hand, I marvel as I watch a beautiful young woman, who is smart, confident, and more prepared than I could ever hope, as she prepares to move on to the next phase of her life and chase after her dreams.
 I knew, as soon as I opened my package with the Cottage Living" collection, that it would be perfect for a few projects for Meagan - the gold foil is one of her favorites, and the designs are perfect for her! She doesn't like a lot of frills and fluff, but I wanted to make her a little something to hang in her dorm room - so this is what I came up with:
I pulled out the photo garland kit from the Happy Day collection, which makes everything super quick and simple.

I filled each of the photo openings with either a photo, or something beautiful from the Cottage Living collection - a quote from the sheet of 3x4 cards (which fit perfectly in the photo openings) or a beautiful piece of foiled, patterned paper so Meagan can add a photo of her choice (or not - because the paper alone is absolutely gorgeous!)

Since the kit comes complete with the twine and clips, she can adjust the length as she needs to (I don't know how much space she will have to hang it in her room).

I'm excited to see how she'll display it! Of course, I couldn't give a gift without creating some fun packaging for it as well. I pulled out the handy, dandy Gift box punch board and created the largest box possible with a 12x12 sheet of patterned paper. The finished box is 4x4x4 and it's perfect to hold this little gift.


The gold tipped tags, along with a sticker and beautiful premade flower made the perfect accent for the gift box.

The jumbo gold clip made adding the tag to the box super easy - and now she can reuse the tag and box if she wants to, because there's no tape and no adhesive residue.

This was a super quick project, but one that I hope will be meaningful to her. I want her to look at the words on these cards each day - aren't those words powerful? And maybe, just maybe, she'll think of home when she looks at it as well!
Supplies: Cottage Living Let's Visit Patterned Paper Cottage Living Sweet Greetings Patterned Paper Cottage Living Gold Tipped Tags Cottage Living Paper Flowers Cottage Living Jumbo Paperclips Cottage Living Puffy Stickers Happy Day Photo Garland Kit Gift Box Punch Board

 And they truly live up to the blog title - quick and easy! Here's how to make it yourself:
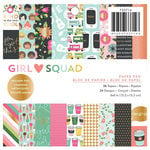
First, start by cutting various patterned pieces (these are from the 6x6 paper pad). The base should be 4" x 5 1/4." The pink dotted paper is 4" x 3" and the black gingham is actually from one of the tear strips, trimmed down to 4" wide. The striped paper is was cut into a half-circle shape and is 4" wide along the flat edge.
And they truly live up to the blog title - quick and easy! Here's how to make it yourself:
First, start by cutting various patterned pieces (these are from the 6x6 paper pad). The base should be 4" x 5 1/4." The pink dotted paper is 4" x 3" and the black gingham is actually from one of the tear strips, trimmed down to 4" wide. The striped paper is was cut into a half-circle shape and is 4" wide along the flat edge.
 After these pieces have been cut, assemble them like this:
 Next, tie white twine around the card:
 Now you'll want to gather stickers, puffy stickers, ephemera, etc.
 Use them to embellish the circle. I used foam adhesive behind the die-cut pieces for a little bit of dimension.
 Adding a sentiment is the next step. You can use digital die-cut shapes, metal dies, stickers, etc. to add a sentiment.
 That completes the card front! Finally, place this entire piece on a white card base (4 1/4" x 5 1/2")
 If you want to create a fun coordinating envelope, pull out some washi tape (this is from the Sunshiny Days collection) and stickers or die-cuts.
 Just add a strip of tape and a few embellishments! Super cute and easy, right?
 Finally, here's a look at the complete set:
 And while you're at it, you should probably whip up at least one more of these quick and easy cards with coordinating envelopes!
 Supplies I used to make these cards:






 I knew, as soon as I opened my package with the Cottage Living" collection, that it would be perfect for a few projects for Meagan - the gold foil is one of her favorites, and the designs are perfect for her! She doesn't like a lot of frills and fluff, but I wanted to make her a little something to hang in her dorm room - so this is what I came up with:


