Showing posts with label gift card holder. Show all posts

Friday, May 31, 2019

graduation gift card mini album | doodlebug design

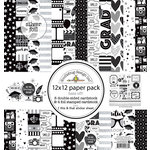
Hello friends! I'm excited to share a little project I made for my favorite graduate with the amazing "Hats Off!" collection from Doodlebug Design!  (The little album I used is a cut file in the silhouette store.) I know...it doesn't look like much - but just wait until you see the inside! I needed to keep the outside kind of flat so the entire piece could be thrown in a purse or backpack.  Because, truly, they are going to want to keep this gift close after they head off to college!  (Oh, and don't miss that fun velcro closure!)
graduation gift card mini album by Wendy Sue Anderson

graduation gift card mini album by Wendy Sue Anderson

 It's a mini accordion album...with pockets!  Here's a closer look at the inside of the front cover - then we'll get to the meat of it! ;)

graduation gift card mini album by Wendy Sue Anderson

Each little pocket is the perfect size for holding a giftcard!  Of course, every grad needs to head to Target to buy supplies for college! 

graduation gift card mini album by Wendy Sue Anderson
Oh, and food.  Every college freshman needs to be spoiled every once in a while - when they are tired of ramen or mac & cheese, they can pull out their handy-dandy gift and treat themselves to a delicious meal out!  And don't miss that awesome graduation cap paper clip on the right page - it's the cutest!

 graduation gift card mini album by Wendy Sue Anderson

 And the perfect gift for any grad - especially your FAVORITE grad?
Cold. Hard. Cash.  It fits perfectly in the pocket as well. ;)

graduation gift card mini album by Wendy Sue Anderson

The last page is perfect for this little grad owl and his special message for your graduate:

graduation gift card mini album by Wendy Sue Anderson


 Don't forget to embellish the back of the closed album:
It's the perfect sticker (with awesome metallic silver) for the back - the perfect message for a new graduate!
graduation gift card mini album by Wendy Sue Anderson

"Hats Off!" to all of this years grads - now go make them something fun to celebrate!!


Friday, March 30, 2018

easter happy mail | pebbles inc.

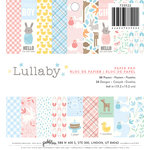
I decided to do something a little different for easter this year - I'm sending some Easter Happy Mail to a few special friends!  I mean, really, what could be happier than receiving these cute little bunnies in your mailbox?  Well, maybe opening up the card to find a gift card for a special local treat!  That's what I call happy mail!  I had fun using the lullaby collection (both boy and girl) to create these cards.  Since each collection had a cute bunny sticker, I thought they were perfect for Easter - and didn't really scream "BABY" as the collection suggests.  I love finding a way to stretch a themed collection, don't you?  Here's a look at the finished project - keep reading for step-by-step instructions!
  Send some happy Easter mail this year! @wendysue used our "Lullaby" collection to create these cute pocket cards! check it out on the @PebblesInc. blog!
 Start with a piece of white cardstock - cut it to 8 1/2" x 5 1/2".  Score both sides at 2 1/2".  Fold the flaps in.
  Send some happy Easter mail this year! @wendysue used our "Lullaby" collection to create these cute pocket cards! check it out on the @PebblesInc. blog!
Now cut a strip of patterned paper 2 1/4" wide.  Then cut this strip into two 5 1/4" pieces. Send some happy Easter mail this year! @wendysue used our "Lullaby" collection to create these cute pocket cards! check it out on the @PebblesInc. blog! 
 Use adhesive to glue down the right and left edges of the bottom flap.  Add the patterned paper strips to the bottom flap (which is now a pocket) and the top flap.
  Send some happy Easter mail this year! @wendysue used our "Lullaby" collection to create these cute pocket cards! check it out on the @PebblesInc. blog!
 Place the bunny sticker on the top flap - only the ears should be "stuck" down.  Use baby powder to remove the stickiness from the body and legs of the bunny sticker.  (I like to sprinkle a little bit on my work surface, then use my finger to rub the powder on the sticky part of the sticker).  Next, add a floral sticker to the inside of the top flap.
  Send some happy Easter mail this year! @wendysue used our "Lullaby" collection to create these cute pocket cards! check it out on the @PebblesInc. blog!
 Now use one of the hearts from the patterned die-cut pieces in the top left corner of the top flap.  Add foam adhesive to a heart sticker and add it next to the first heart.
  Send some happy Easter mail this year! @wendysue used our "Lullaby" collection to create these cute pocket cards! check it out on the @PebblesInc. blog!
 Now it's time to tuck a note and gift card inside the pocket!
  Send some happy Easter mail this year! @wendysue used our "Lullaby" collection to create these cute pocket cards! check it out on the @PebblesInc. blog! 
 Wrap coordinating twine around the outside of the card and tie a bow!  That's all there is to it!  Slide it into an envelope and pop it in the mail - you're going to make somebody's day!! Send some happy Easter mail this year! @wendysue used our "Lullaby" collection to create these cute pocket cards! check it out on the @PebblesInc. blog! 
 Here's a closer look at the pink version: Send some happy Easter mail this year! @wendysue used our "Lullaby" collection to create these cute pocket cards! check it out on the @PebblesInc. blog!
Do you love making your own cards and sending them to special people?  Share your Easter Happy Mail ideas in the comments! Supplies I used: