Showing posts with label scrapbook. Show all posts

Saturday, January 07, 2023

snow adorable | echo park paper

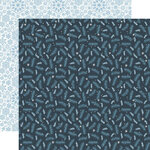
I created this layout for Echo Park Paper using their "The Magic of Winter" collection. 

snow adorable - scrapbook layout by wendy sue anderson

I couldn't resist using the adorable winter blues for this photo of my cute kiddo playing in the snow!

snow adorable - scrapbook layout by wendy sue anderson

One of my favorite go-to techniques is machine stitching - I stitched a double frame around this page.

snow adorable - scrapbook layout by wendy sue anderson

And I love the faux stitching on these "stitched circle" dies too! 

snow adorable - scrapbook layout by wendy sue anderson

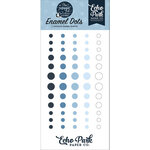
Supplies (click on the affiliate links below for more information or to purchase):


Thursday, May 07, 2020

Family Tradition Layout | Pebbles Inc.

One of my resolutions for this year is to document some of the photos and memories that have been stacking up on my bookcase. The "This is Family" collection was a perfect match for documenting a photo taken a few years ago at my husband's annual winter family party!


Annual family party layout by Wendy Sue Anderson for @PebblesInc featuring the "We Are Family" Collection

This collection has a huge array of colors and patterns, but I wanted to keep it simple, so I chose black and white with pops of yellow and orange from the papers and embellishments.


Annual family party layout by Wendy Sue Anderson for @PebblesInc featuring the "We Are Family" Collection

There is obviously a variety of "family" themed pieces in this collection so it worked great for my needs.


Annual family party layout by Wendy Sue Anderson for @PebblesInc featuring the "We Are Family" Collection

You'll also spy a bit of machine stitching around the edges of the patterned papers - I just can't help myself! It's a fun way to add a bit of unexpected texture as well as a pop of color to a project.


Annual family party layout by Wendy Sue Anderson for @PebblesInc featuring the "We Are Family" Collection

Well, how about YOU? Do you have a stack of photos and memories waiting to be recorded and added to your albums? Why not start today? Grab a family photo and the "This is Family" collection and see what you can whip up! Your family will thank you!!


Thursday, November 29, 2018

washi tape christmas tree layout | doodlebug design

You guys!  I don't know how this happened, but I just came across a bunch of Christmas project blog posts from the last few years that I didn't upload and share here! I'm so sad that I missed these...so I'm going to share them over the next few days.  If I can find the products available somewhere I'll link below - if not, hopefully the ideas are still inspiring - even if you use different products!

*****

The first layout I want to share was created for the Doodlebug Blog!  I used one of their awesome Christmas collections.  You can see lots of fun Doodlebug Christmas products HERE - check it out!!

  I couldn't wait to create a fun tree for last year's Christmas PJ's layout.  Here's a look at the completed page, but keep reading for more details!

washi tape christmas tree layout by @wendysue for @doodlebugdesign

I started by cutting a Christmas Tree shape out of white cardstock.  I used the same piece of cardstock for my layout base.  After I added a piece of patterned paper, the spot where the tree was cut out is covered up.  Here's a look at the back.  You could actually create a fun layout right on this side too!

washi tape christmas tree layout by @wendysue for @doodlebugdesign

Anyway, back to the tree.  After I cut out the simple tree shape, I started adding strips of washi tape.  I didn't want it to get too busy, so I alternated two different designs.  You can either trim off the edges, or fold them to the back.  I did a little bit of both.  After the front was covered, I added lots of coordinating glitter sprinkles and made a make-shift pot to put the tree in.  I added it to the layout with foam adhesive squares for a bit of depth.

washi tape christmas tree layout by @wendysue for @doodlebugdesign

Don't you just love these new "Abigail" letter stickers?  I sure do!  They worked perfectly for my title, and I used a sticker (again on foam squares) with a heart shaped clip for the subtitle.

washi tape christmas tree layout by @wendysue for @doodlebugdesign

I wanted to keep the page pretty simple so the focus could stay on the photos and the big tree, but I had to add a few embellishment clusters like this one with stickers and enamel sprinkles.

washi tape christmas tree layout by @wendysue for @doodlebugdesign

And, of course, another bit of washi tape here on the bottom:

washi tape christmas tree layout by @wendysue for @doodlebugdesign

So...how about you?  What's your favorite way for using washi tape?!? I challenge YOU to make an oversized tree for your next layout!

washi tape christmas tree layout by @wendysue for @doodlebugdesign


Wednesday, October 24, 2018

pumpkin picking layout | pebbles inc.

This is another layout I shared on the Pebbles Inc. blog last year, and didn't share here!  Hope you enjoy it - even though it's not brand new!

Who says Halloween layouts need to be scary?  Not me!  When I started scrapbooking (about a million years ago), I opted to create 8 1/2" x 11" pages.  Over time, I adopted the 12" x 12" size, but every now and then, I like to create a smaller page, for old time's sake.  And, truth be known, I still really like creating this size!  You should try it - they fit right in your  12x12 albums, so mix it up sometime, just for fun!  Anyway, that's not what I'm here to talk about today - instead, I wanted to share this cute layout with my two youngest pumpkins choosing their Halloween pumpkins last October.
  Pumpkin layout by @WendySue with the "Midnight Haunting" collection by @PebblesInc. 
 Aren't they cute?  And how about that paper-pieced pumpkin in the bottom corner of my page?  See?  Here I go again - taking it back old-school...I mean, paper piecing?  But really, it's always been one of my all-time favorite techniques and sometimes I think it's still 100% appropriate.  Like here!  These pumpkins would be cute on a card, or even in a frame, and they are so easy to create.  Here's how: First, cut out three oval shaped pieces from patterned paper.  You can use  a punch, a die, or just free-hand them - they don't have to be perfect!

  Pumpkin layout by @WendySue with the "Midnight Haunting" collection by @PebblesInc.  
Attach two of the ovals together with adhesive, slightly overlapping:

  Pumpkin layout by @WendySue with the "Midnight Haunting" collection by @PebblesInc. 

 Next, grab some ink and add some subtle definition around the edges of each piece:

  Pumpkin layout by @WendySue with the "Midnight Haunting" collection by @PebblesInc. 
 Now pull out your foam adhesive dots and place some on the back of the third oval:
  Pumpkin layout by @WendySue with the "Midnight Haunting" collection by @PebblesInc. 
 And place it right on the center of the two other (attached) ovals.  See how it looks 3-dimensional?
  Pumpkin layout by @WendySue with the "Midnight Haunting" collection by @PebblesInc. 
 Hand-cut a quick stem from a piece of coordinating paper and glue it to the back of the pumpkin:
  Pumpkin layout by @WendySue with the "Midnight Haunting" collection by @PebblesInc.
It's cute as it is, but you can also embellish this cute guy a little bit.  I found a cute orange button in my stash, along with some twine.
  Pumpkin layout by @WendySue with the "Midnight Haunting" collection by @PebblesInc. 
 You saw this coming, right?
  Pumpkin layout by @WendySue with the "Midnight Haunting" collection by @PebblesInc.
And now add as much or little embellishment as you want.  As you can see, I added some sticker and die-cut leaves on either side of the stem:

  Pumpkin layout by @WendySue with the "Midnight Haunting" collection by @PebblesInc. 
 I think that's a pumpkin with some real personality!  And so easy, even the kiddos could make them! Just for fun, here are a few more details from my page:

  Pumpkin layout by @WendySue with the "Midnight Haunting" collection by @PebblesInc.Pumpkin layout by @WendySue with the "Midnight Haunting" collection by @PebblesInc. 

 So now the challenge is yours - create a pumpkin for your next Halloween project!  And if you're feeling extra creative, try a new size in your scrapbook!  Happy Pumpkin Season, friends!

 Supplies: