
I made this fun little food wrapper for a Making Memories project and thought it would be fun to share the step-by-steps, just in case you’d like to try it:

Step 1:
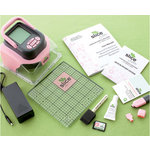
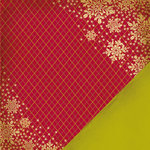
Use the SLICE to cut several 1” images (I used the gift on the NOEL design card) out of patterned paper (I used the Argyle paper from the Noel Collection)

Step 2: Remove the images from the cutting mat

Step 3: Lay a strip of paper towels on your ironing board. Arrange the images randomly on a sheet of wax paper, on top of the paper towels

Step 4: Add another sheet of wax paper, then a layer of paper towels. Use an iron (on a medium setting) to “fuse” the layers together. Be sure not to let the iron sit still for too long, and don’t use it on the high setting!
Step 5: Keep checking – when the layers are “fused,” go ahead and remove the paper towels and allow the wax paper to cool

Step 6: Wrap your homemade treats – embellish with ribbon or twine – and add a cute tag! 

What a great idea!
ReplyDeletethat's such a fun idea! i honestly didn't even notice that you had sliced those presents ... i just thought it was printed paper wrap. lol!
ReplyDeleteHoly cow you're so smart! This turned out so cute!! Thanks for sharing with us :)
ReplyDelete