Showing posts with label gift box. Show all posts

Friday, February 03, 2023

valentine's day boxes | echo park paper

Welcome to February! It's time to start thinking about Valentine's Day gifts...and how we're going to wrap them up. ♥ Here's a fun little idea for treats or smaller gifts (including gift cards). 

Valentine's Day treat boxes by Wendy Sue Anderson for Echo Park Paper

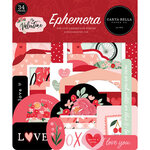
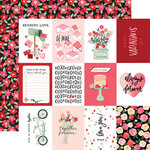
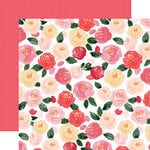
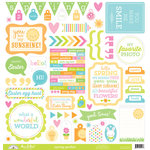
I created this set of boxes for Echo Park Paper using Carta Bella's "My Valentine" collection - isn't it pretty?!?

Valentine's Day treat boxes by Wendy Sue Anderson for Echo Park Paper

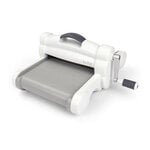
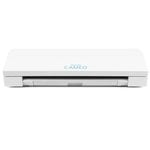
I cut the boxes with my Silhouette Cameo using a digital cut file. 

Valentine's Day treat boxes by Wendy Sue Anderson for Echo Park Paper

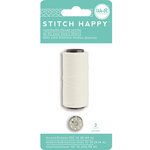
To created the shapes on the tops, I used some of Echo Park's metal die cuts with faux stitching around the edges - these are honestly one of my favorite products ever! 

Valentine's Day treat boxes by Wendy Sue Anderson for Echo Park Paper

How would you fill up these sweet little boxes?

Valentine's Day treat boxes by Wendy Sue Anderson for Echo Park Paper

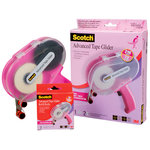
You can use my affiliate links below to purchase everything you need to make these Valentine's Day boxes yourself!

Tuesday, April 10, 2018

quick spring gift project | pebbles inc.

Hi friends,  I wanted to pop in today, and share a quick spring gift project!  I used the beautiful products from the "Tealightful" collection by Pebbles, Inc., to create these milk carton gift boxes.  They would be perfect for holding sweet treats, tea bags, or even gift cards!  And, in keeping with the assignment, they truly are quick and easy!
  Quick Spring Gift Project by @Wendysue with the "Tealightful" collection by @PebblesInc. 
 I used a cut file from the Silhouette store for the cartons.  Just search for "milk carton" on their site and you'll find lots of fun options!  After the carton has been cut, fold along all of the score lines.
  Quick Spring Gift Project by @Wendysue with the "Tealightful" collection by @PebblesInc. 
 I really like this red tape to assemble 3-d projects.  It's super strong and keeps boxes and bags together!
  Quick Spring Gift Project by @Wendysue with the "Tealightful" collection by @PebblesInc. 
 After the box is assembled, it's time to add embellishments. Quick Spring Gift Project by @Wendysue with the "Tealightful" collection by @PebblesInc. 

 I layered a couple of printed die cuts together.  Then I clipped them to the top of the milk carton and tied a twine bow around the clothespin.
  Quick Spring Gift Project by @Wendysue with the "Tealightful" collection by @PebblesInc.

For the phrase/sentiment, I used a sticker from this collection.  I used my small scissors to notch the end and then added it to the top of the layered die cuts with foam adhesive.
  Quick Spring Gift Project by @Wendysue with the "Tealightful" collection by @PebblesInc.
I wanted to add a bit of interest to the front of the milk carton as well.
  Quick Spring Gift Project by @Wendysue with the "Tealightful" collection by @PebblesInc.
I layered a few of the coordinating die cuts together and attached them to the front of the milk carton with foam adhesive squares.
  Quick Spring Gift Project by @Wendysue with the "Tealightful" collection by @PebblesInc.
Tada, the finished product! 
  Quick Spring Gift Project by @Wendysue with the "Tealightful" collection by @PebblesInc. 
 And because they are so quick and easy, you can easily whip up a few extras!  Here's a strawberry printed box:
  Quick Spring Gift Project by @Wendysue with the "Tealightful" collection by @PebblesInc.
And a cute pink gingham box too!
  Quick Spring Gift Project by @Wendysue with the "Tealightful" collection by @PebblesInc.
I hope you like this Quick Spring Gift Project!  Give it a try and then share your finished product with us!! 

 Supplies I used (and BONUS, many of these items are now on sale or clearance): 


Pebbles - TeaLightful Collection - Cardstock Stickers - Words
Scrapbook.com

**and these are all affiliate links - thanks for clicking**

Thursday, March 29, 2018

carrot shaped easter boxes | doodlebug design

Hi  friends! I wanted to hop on today and share one of my most favorite Easter projects EVER!


I absolute adore the "Easter Express" collection from Doodlebug Design and I knew as soon as I opened it up that it was going to make some super cute little treat containers for some friends!

I used a "carrot box" cut file (HERE), along with some "petite prints" paper to create the carrot shaped boxes.


 The tops are tied with chunky doodle twine, then I added some shaped clips to the bows - I think they look like sweet little charms!  I also added a small strip of coordinating doodle tape to each box, about 1/3 of the way up from the bottom!


The tags are simple die-cut circles from various papers from the 6x6 paper pad, and embellished with lots of sweet animal stickers!


I used foam adhesive behind the stickers, because I just love that teensy bit of dimension it adds.

Of course, I had to fill them up with some of my favorite Easter candies before I gave them away:


Wouldn't these be cute tucked into an Easter basket?  I think they would!

Do you like to create your own packaging for treats?  I'd love to see what you're giving away this Easter - please leave a link in the comment section below!


Happy Easter!
♥ Wendy Sue

Supplies: