Wednesday, August 28, 2013

bread wrap and a super yummy recipe…

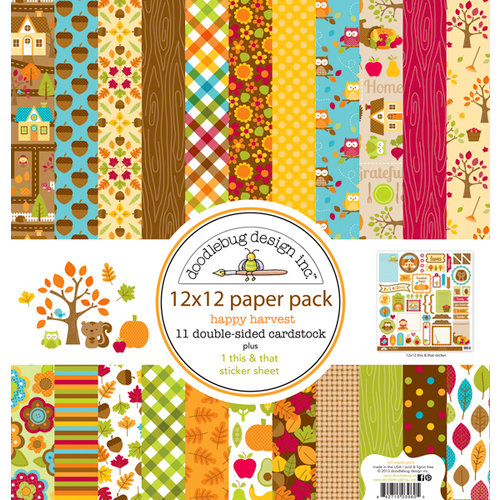
Good morning friends!  I woke up this morning to a fog-filled world.  It rained [hard] last night so everything is soaked – and it smells so. dang. good.  I love the smell of rain.  And this morning it not only smelled like rain, but there was just a hint of fall in the air.  Yay – my favorite season!  And speaking of fall…I just have to share a little project I made with Doodlebug’s new “Happy Harvest” collection!

wendysue_happyharvest_bread_wrap1

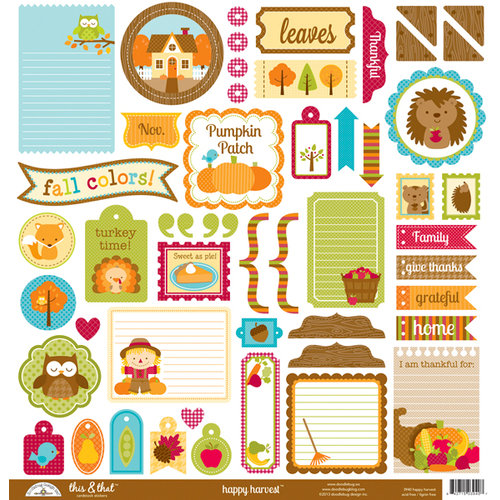
I used lots of bits and pieces (including the patterned paper, stickers, 4x6 cards, and even the new AWESOME sprinkles) to create a wrap for a loaf of this super yummy banana bread.

wendysue_happyharvest_bread_wrap3

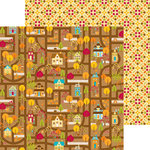
I thought this patterned paper (with the streets and houses) was just the perfect design for a “welcome to the neighborhood” gift – so that’s the main wrap around the bread.

wendysue_happyharvest_bread_wrap5

I cut the cute little house and banner piece from a 4x6 card – the original card had text above the house…I can’t remember what it said, but I didn’t want my bread wrap to necessarily be “fall” themed, so I used rub-on letters on top of the arrow sticker and placed it right over the existing word.

wendysue_happyharvest_bread_wrap4

Of course, I used plenty of foam dots – because I love them – to add fun dimension to my project.

And a hand-written note finished it off!

wendysue_happyharvest_bread_wrap5a

And of course I have to share this yummier than yummy recipe for banana bread – originally shared with me by my cute friend Holly (it’s originally from here)…I’ve made a few changes over the years as I’ve made this recipe dozens of times – it’s the one baked item Josh will actually ASK me to make and something everyone in our family enjoys.  I hope you enjoy it as well!

Ingredients:

  • 1 1/2 cup mashed bananas (usually about 3 bananas)
  • 1 cup sour cream (I’ve used non-fat and it works great – plain yogurt can also be used)
  • 1/4 cup butter (softened)
  • 1 cup white sugar
  • 2 eggs
  • 2 teaspoons vanilla extract
  • 2 cups all-purpose flour
  • 1 teaspoon baking soda
  • 1 teaspoon baking powder
  • 1/4 teaspoon cinnamon
  • 1/4 teaspoon salt
  • 2 cups chocolate chips (of course you can leave these out, but I don’t know why you’d ever want to! – you could also add nuts if you prefer)

Preheat oven to 350 degrees F (175 degrees C). Grease two bread loaf pans

  • Combine banana and sour cream. Set aside.
  • In a large bowl, cream the sugar and butter and sugar until smooth. Beat in the eggs one at a time, then stir in the vanilla and banana mixture.
  • Sift together the the flour, baking soda, baking powder, cinnamon and salt; stir into the banana mixture.
  • Spread the batter evenly into the prepared pan or pans.
  • Sprinkle the chocolate chips on top and use a skewer to press them down just until they are covered with dough.  Don’t mix them before you pour the dough into the pans or push them too far in or they will all settle on the bottom…this is not as yummy as having them all mixed throughout!
  • Bake for about 50 minutes in the preheated oven, or until a toothpick inserted into the center of the bread comes out clean.
  • Enjoy!

After you make this recipe once, you might find yourself buying extra bananas just so you have an excuse to use up the ripe ones!  (not that I would know anything about that…)

Oh…one more thing – did you know you can freeze ripe bananas and use them in recipes later?  I just learned this (and I may be late to the banana party…), but you can peel them and put them into freezer bags and pop them in the freezer.  Just pull them out and allow them to thaw next time you want to make banana bread.  You’ll never have to throw away an over-ripe banana again!

***This project, and lots of other fun ideas, are being featured today on the Doodlebug Blog (HERE) – go check it out!!***

supplies2


Doodlebug Design - Happy Harvest Collection - 12 x 12 Paper PackDoodlebug Design - Happy Harvest Collection - Sprinkles - Self Adhesive Enamel Dots - FallDoodlebug Design - Happy Harvest Collection - 4 x 6 Album InsertsDoodlebug Design - Happy Harvest Collection - 12 x 12 Cardstock Stickers - This and ThatDoodlebug Design - Happy Harvest Collection - 12 x 12 Double Sided Paper - Harvest HomesDoodlebug Design - Happy Harvest Collection - Doodle Twine - Fall - AssortmentDoodlebug Design - Happy Harvest Collection - Cardstock Stickers - Quotes3-D Dots - Adhesive Foam Squares - White - 1/8" Thick

Would you like to win some of this autumn goodness for yourself? Click here to find out how!
Monday, August 26, 2013

it hit me…

It’s taken me two years to be able to scrapbook this photo – and this story.  I have really struggled with my desire to record the emotions I experienced after Zach’s stroke…and the following months.  It’s still a tender spot for me and even though I feel it’s important to record my thoughts and feelings, I also know I have to do it as I feel comfortable.    I finally felt ready to write a little bit about it and took the opportunity to share this story, photo, and layout on the lily bee blog today. 

wendysue_lilybee_layout1

As I said over on the lily bee blog, "Sometimes a picture tells a story. Sometimes a story needs a lot of words. Sometimes I choose both.

wendysue_lilybee_layout_detail4

If you’re interested in the journaling, but don’t want to have to squint to read it, here it is: 

And just like that, it hit me. This was the moment I had been both anticipating and dreading. My baby was growing up. This little boy who had barely left my side for five and a half years was going to leave me every single day. For 3 whole hours. Although I was looking forward to the opportunity of working during daylight hours (rather than staying up all night to work as I had done happily for many years, just so I could be at home with my kiddos all day), I found myself feeling sad. Sad that my little sidekick would not be hanging out with me all day, every day. Sad that I had to face the fact that I was no longer the mother of toddlers or preschoolers. Sad that this phase of my life was officially over. At the same time, I was overwhelmed with gratitude. So thankful that this little boy, who had, only 2 months earlier, laid unconscious in a hospital bed while we wondered if and when he would wake up again. We wondered and hoped and prayed that when he did wake up, he would be the same little boy who had simply fallen asleep early one night…little did we know that he was the sweet, innocent victim of a stroke. I felt grateful that he was not only able to wake up, but walk, talk, play, and function as normally as anyone else. Grateful to know that, in spite of the new knowledge we had about his health, he was able to carry on as if nothing had changed. In reality, everything had changed. But it wasn’t Zach who had changed. I was changed. Forever. My priorities changed. My ideals changed. Most of all, my perspective changed. Every day is a gift. Every new experience. Every opportunity to watch him grow and develop and learn and love and live. That’s what this day was – a new experience. I felt gratitude as I watched him walk down the path, off to a new adventure called Kindergarten…and I smiled and maybe cried a little, but I was glad to have it hit me like it did.

I wrote a little bit about Zach’s stroke HERE and HERE…when it was still so fresh and raw and scary.  It’s still scary…it always will be… 

Here are some of the fun decorative details from my layout:

wendysue_lilybee_layout_detail1wendysue_lilybee_layout_detail2wendysue_lilybee_layout_detail3wendysue_lilybee_layout_detail5

This is why I scrapbook.  To tell the story of my life.  Not only to share experiences and events (though I love doing that as well)…but to tell the story behind the photos.  To record the thoughts and feelings that are purely mine.  There’s no right or wrong to the way the scrapbook. 

I just want to tell the story of me…and my little world.…

supplies2

Friday, August 23, 2013

happy camper…

Let’s be honest here…I am not a camper.  The few times I have actually camped, it’s been close to home and in a trailer.  I know you “real” campers wouldn’t even consider sleeping in a trailer to be “real” camping.  The only time I’ve slept in a tent was at 4H camp in 4th grade.  I don’t remember it being particularly traumatic, but maybe it was…and perhaps that is the reason I don’t care to do it again.  ever.  But I digress…

In spite of my aversion to actually camping, I am LOVING the “Happy Camper” line by Echo Park Paper.  I was able to create some fun projects with it earlier this summer and I’m excited to share this one with you today. 

home card by wendy sue

Aren’t those little tents just the cutest things?!?  I think they are absolutely darling (as long as I don’t have to sleep in them, obviously).

home card closeup1by wendy sue

You can see this card, along with lots of other fun ideas with this line on the Echo Park blog (here).

supplies2

Thursday, August 22, 2013

it’s never too early for candy…

…that’s why I chose to  decorate these theater-size boxes of M&M’s for my Doodlebug Halloween Parade project this week. 

Here’s the witch version:

wendysue_db_halloween_treats4

And the “date night” version (the crew out cruisin’):

wendysue_db_halloween_treats6

These were so quick to put together – especially when I had all of these cute products from the Halloween Parade collection sitting out in front of me.  I just love the 4x6 cards – they were perfect to wrap around the front of the boxes, and those little star gems added just the right amount of sparkle! :)

wendysue_db_halloween_treats2

Be sure to stop by the Doodlebug blog this week to see the entire collection, lots of creative ideas, and see how you can WIN this collection for yourself!!

And now, I’ve decided that since Halloween is still so far away I probably should go ahead and eat the candy inside so it doesn’t spoil before the holiday. ;)

Saturday, August 17, 2013

a couple of recent projects…

I know it seems like I’m not around here much anymore…I really need to get better about sharing my projects here on my own blog as soon as they go live on the other blogs.  Not to mention sharing all the cute pics of my kids and our family activities!  Maybe with school starting next week I’ll be able to get back into a more regular routine (in many aspects including, but not limited to, blogging) again.

Speaking of school projects – this little project is live on the Doodlebug Blog today.

wendysue_doodlebug_teacher_gift_set

You can see the details HERE (and be sure to check out all of the other projects by my fellow design team members while you’re there).

And I also put together a fun little tutorial for creating this card:

wendysue_wow170_card

The entire step-by-step photo tutorial is on the Create: blog HERE.

Hope you’re having a great weekend and finding lots of time to be creative too!

Tuesday, August 13, 2013

project life | a field trip…

Hi friends!  I have a fun project to share with you today – it’s a scrapbook spread I put together using a “Project Life” kit.  I will likely never use Project Life (or pocket scrapbooking in general) exclusively, but I LOVE the concept behind it.  I use this style intermixed with regular pages in my albums. 

wendysue_pl_fieldtrip_spread

The kit I used to create this page is The Vintage Travel Core Kit available exclusively at Michael’s stores.  (Michaels carries one of the largest selections of Project Life, including two exclusive core kits and several exclusive albums.)  It features deep blues, reds and browns, along with a variety of darker neutrals. The icons in this Edition include trains, airplanes and maps.  I thought it was the perfect kit to use with these photos from a field trip Seth went on a few years ago.

Project-Life-SAMPLING-VintageTravel

Before I continue, I must let you know that this post is part of a paid campaign with American Crafts, but all opinions are my own.  I would never promote a product I did not think was worth sharing!  Here’s why I love Project Life:

  • I can create FUN pages for my scrapbook without having to cut or glue a single thing.  The premade cards simply slip into the pocket pages.  All I have to do is add photos and journaling!
  • Of course, it’s always an option to get more creative with these premade items if I want to – I could always add stickers, machine stitching, layering, additional embellishments, etc.  But even if I don’t add a single thing, my memories are preserved and the pages are fun and interesting to look at too.
  • Anybody can do this.  For all of my friends who have ever dared utter the following words to me: “I just don’t have time to scrapbook,” well…now you absolutely do.  This style takes almost no time at all – really!  The most time consuming part of the process is printing the photos!  And the only decisions you have to make are fun ones – which photos to print 4x6 and which to print 3x4. (I couldn’t resist adding a photo of this “outlaw” to this layout.  We were treated to a real old-fashioned “hold up” when we rode the train!)

wendysue_pl_fieldtrip_outlaw_photo

  • If you don’t like your own handwriting, you can always print directly onto the journaling cards with your printer…but adding your handwriting adds a personal touch and it’s a LOT faster!  I love using these precision pens from American Crafts to write my journaling.

wendysue_pl_fieldtrip_journaling

wendysue_pl_fieldtrip_journaling2

  • Of course titles aren’t necessary, but I really like adding them to my pages – Project Life projects are no exception – it’s easy to use stickers to add a title to a journaling card.

wendysue_pl_fieldtrip_title

  • Adding a few stickers to a journaling card is also a fun way to add a subtitle or just additional information…

wendysue_pl_fieldtrip_stickers_and_journaling

  • And even though you don’t have to trim photos with scissors or punches, you certainly can!  I used a circle punch to add this little photo one of the journaling cards.

wendysue_pl_fieldtrip_circle

So there you go – 7 of the many reasons I think Project Life is a great approach to scrapbooking.  A beginner who has never created a scrapbook page in her life or a pro who has been creating pages for a lifetime – Project Life has its place and it’s definitely worth investing in regardless of whether you use it for ALL of your scrapbooking or just for certain events (like I do).  I’ll be using it, along with traditional scrapbooking, in my albums and I’ll be sharing more of my pages and ideas here on my blog so be sure to come back often!