
The inspiration for this card came from this awesome 6x8 paper pad:

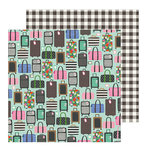
Here's the paper I chose:

I decided to cut the paper in half, length-wise - and that will be the base of my card! So the card size is approximately 8" long and 3" tall.

The next step was to choose a coordinating paper. I opted for this fun text paper - but I chose to leave the tear strip ATTACHED! It will be part of my card design!

After I trimmed it down to 8" long and 1 1/2" tall (including the tear strip), I attached it to the plaid background.

A totally optional step is to add machine stitching...and of course, I opted to do it because I LOVE machine stitching on my projects!

Now it's time to start embellishing! I started by adding foam adhesive dots behind this fun tag and placing it on the left end of my card front.


Next, I added another printed die-cut onto the tag. I love the gold foiling on this piece!

I continued adding layers and ribbon to embellish the tag:

Next, I added the thicker sentiment to the right of the tag:

I added a few coordinating enamel dots and placed the entire piece onto a white card base, which was 8 1/4" x 3 1/4" and folded over at the top.

Using the same exact process, with slightly different papers/embellishments, I made my second card for next month:

Will you try making an odd-shaped card this week?? We'd love to see what size and design you come up with!

Supplies Used:




This comment has been removed by a blog administrator.
ReplyDelete