Friday, October 16, 2015

how to make your own diy trick-or-treat container…

Well, hello friends!  Just popping in today to share a fun little project tutorial I created for the Doodlebug Design blog featuring their super cute October 31st collection. 
Repurposed wood crate for Halloween Treat Box by Wendy Sue Anderson for Doodlebug Design

 I wanted to make a little Halloween treat basket to keep on my desk at work - because all of my co-workers appreciate a little chocolate pick-me-up during a long work day (and I feel much less guilty about eating chocolate if I'm sharing with my friends!).  I started with this little wooden crate, which originally held a fun little holiday cheese sampler - last Christmas!  See, you've gotta hang on to these things because you just never know when you're going to be able to re-purpose them.  Anyway, here's how it started:
Repurposed wood crate for Halloween Treat Box by Wendy Sue Anderson for Doodlebug Design
I measured the inside of the crate and cut a few different papers from the collection to line the insides (I didn't want stray candies escaping through the sides). I just used a bit of adhesive to secure the paper to the wood.

Repurposed wood crate for Halloween Treat Box by Wendy Sue Anderson for Doodlebug Design


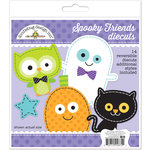
The "trick or treat" washi tape was perfect to wrap around the wooden slats and Mr. and Mrs. Ghostie look awfully cute, holding hands in the back of the crate.  They are part of the die-cut set.


Repurposed wood crate for Halloween Treat Box by Wendy Sue Anderson for Doodlebug Design


And I thought they looked like they wanted to say something, so I added these cute speech bubble stickers.  Next, I covered the front of the crate with another fun patterned paper. 
   

Repurposed wood crate for Halloween Treat Box by Wendy Sue Anderson for Doodlebug Design

 
  I thought this label sticker would be the perfect addition to the front of the crate.  I rubbed baby powder on the back to remove the stickiness and placed two mini clothespins to on the top.See how nicely it sits right on the front of the crate?  Oh, I added a strip of the spiderweb paper to the front also, because I felt like the label kind of got lost in the business of the other paper alone.

Repurposed wood crate for Halloween Treat Box by Wendy Sue Anderson for Doodlebug Design

     And of course, I had to add these little trick-or-treating doodle-pops to the front!

     Isn't it cute??
Repurposed wood crate for Halloween Treat Box by Wendy Sue Anderson for Doodlebug Design

     The only thing left to do is add the treats!!  mmmmm...I LOVE Halloween!

Repurposed wood crate for Halloween Treat Box by Wendy Sue Anderson for Doodlebug Design

     So the next time you receive a gift in a cute little container, hang on to it!

     You never know when you'll be able to dress it up (ha ha, get it??)...

And fill it up with something yummy...To share with your ghoul-friends!

     Okay, I'll stop now...but really, pick up this fun collection and see how you can use it to create an eerily fun and spooktastic project!!

Happy Halloween - eat lots of treats and share them too! :)

{affiliate links}

Wednesday, October 14, 2015

over-sized santa tags, plus bonus gift tags…

Good morning friends! I know, it’s been a while…but I’m here today, sharing a couple of super fun (and easy) projects I created with the new Sugar Plum collection by Doodlebug Design!
Christmas Tags By Wendy Sue Anderson for Doodlebug Design
When Santa comes to our home on Christmas Eve he leaves the gifts wrapped and sorted into areas so each child gets their own little stack.  Does he do that at your house?  Sometimes he needs a little bit of help keeping the piles straight, so this year I decided to help him out by creating these giant tags for each child. Santa will just have to make sure the correct tag is placed on or near each child's gifts and there won't be any confusion on Christmas morning - yay!
Christmas Tags By Wendy Sue Anderson for Doodlebug Design


To create the tags, I cut a regular paper in half.  Then I folded the bottom up 4" so the reverse side of the paper is showing.  This made the base 6"x 8".
Christmas Tags By Wendy Sue Anderson for Doodlebug Design

Next, I added a strip of striped paper at the top of the  folded portion (this striped paper was cut from the 6x6 pad).

Christmas Tags By Wendy Sue Anderson for Doodlebug Design

After that, I added a strip of Santa doodle tape (isn't that the cutest?  I think I'm going to use that instead of scotch tape to wrap my gifts this year!), and a border sticker, below the striped paper.  I also tied a piece of doodle twine around the entire piece, tying a bow to the right side and clipping on a mini clothespin.

Christmas Tags By Wendy Sue Anderson for Doodlebug Design

I punched half circles and added them to the top of each tag, and placed an enamel dot over each top as well.  The main image is from the 4x6 card page - and each one is embellished with letter stickers, various stickers, and enamel dots.

Christmas Tags By Wendy Sue Anderson for Doodlebug Design


I started feeling a little jealous that Santa had his tags all ready, and I didn't have mine yet...so I decided to fix that!  I simply took this awesome patterned paper:

Christmas Tags By Wendy Sue Anderson for Doodlebug Design

And cut the tags out.  I also punched the holes in the top:

Christmas Tags By Wendy Sue Anderson for Doodlebug Design

And then I pulled out my brand spankin' new AMAZING rolls of chunky twine

Christmas Tags By Wendy Sue Anderson for Doodlebug Design

And added colorful twine to each tag.

Christmas Tags By Wendy Sue Anderson for Doodlebug Design

Now Santa and I BOTH have a jump start on our holiday gift tags!  What could be better?!?

Christmas Tags By Wendy Sue Anderson for Doodlebug Design
Now if I could only have my shopping done already…

{affiliate links}